

 HANDS ON SharePoint
 HANDS ON Teams
 HANDS ON Lists
 HANDS ON tek
 M365 Admin
How to Add Images to Microsoft Places Rooms and Desks
Microsoft Places has come a long way since its first preview release, back when it didn’t even have an admin interface. Fast‑forward to today, and admins can create and manage rooms and desks directly from the admin center. Capacity, amenities, names, zones… everything is there.
Well, almost everything. There’s still one small detail missing in the Places admin experience, and for someone visual like me, it makes all the difference: the ability to add an image that represents the room or desk.
Even though Microsoft Places doesn’t expose this option in the UI yet, there is a way to add these images today.

Why Room and Desk Images Matter
It might sound like a simple aesthetic touch, but visuals completely change how people interact with shared spaces. A picture gives context. It reduces uncertainty. It helps employees pick the right room faster. And in hybrid workplaces where shared spaces matter, a quick visual confirmation is often more helpful than a long description.
A photo of a space does more than make the interface look nicer. It brings practical benefits:
- Instant recognition: People know immediately whether the room fits their needs: layout, lighting, furniture, displays.
- Reduced friction: No more guessing if “Riverside Huddle 2” is the one with the round table or the one with the screen on the side.
- Better adoption: Visual cues help people trust the system and rely on it more often.
- Consistency with real usage: Employees are used to having images in Outlook room cards and in Microsoft Teams meeting spaces. Extending that to Places just feels natural.
So until Microsoft adds native support in the Places admin center, here’s the workaround that works perfectly today.
The Trick: Use the Resource Email Address Profile Picture
Every room and desk created for Microsoft Places has something in common:
each one is backed by a Microsoft 365 email address.
Because it has an email address, it also has:
- a mailbox
- an Azure AD object
- a profile picture slot
This profile picture is exactly what Microsoft Places reads when it tries to display an image for a room or desk.
How to Add the Room or Desk Image Using Entra ID
Here’s the step‑by‑step process:
- Go to Entra ID (https://entra.microsoft.com).
- Navigate to Users.
- Search for the room/desk.
- Open the user object.
- Click the camera icon in the Profile picture
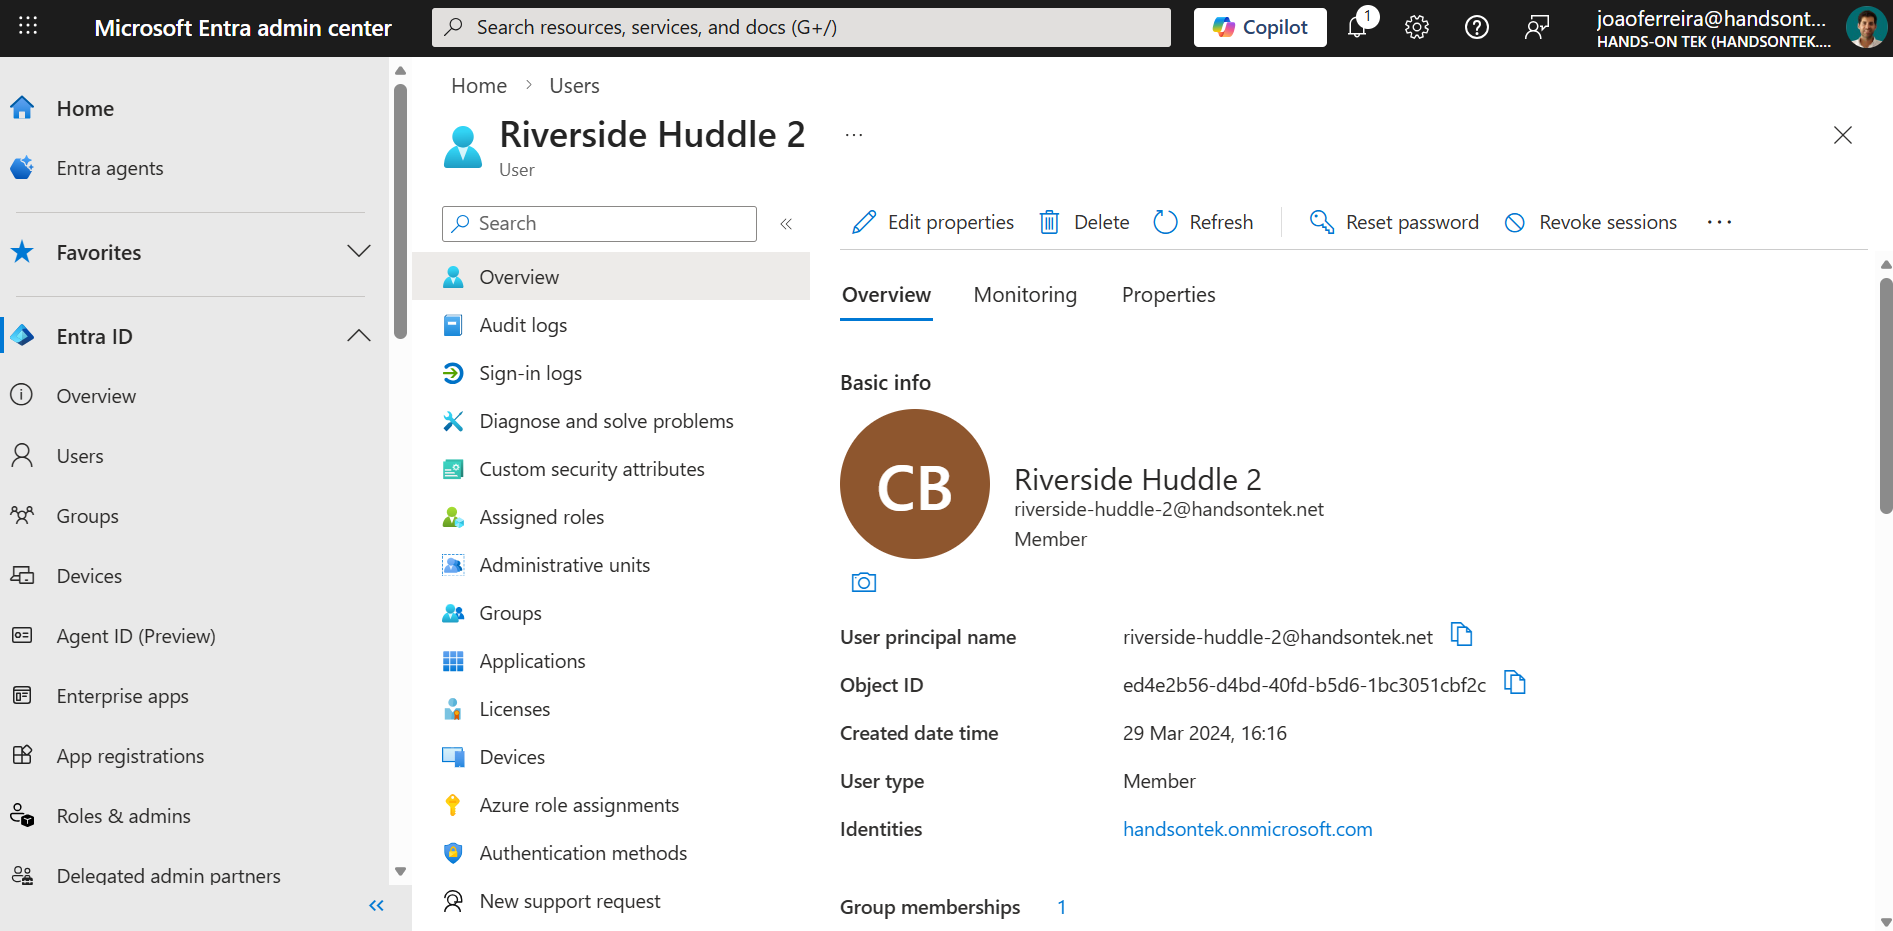
- Upload the image of the room or desk.
- Save your changes.
Changes usually show up in Microsoft Places within minutes.
Conclusion
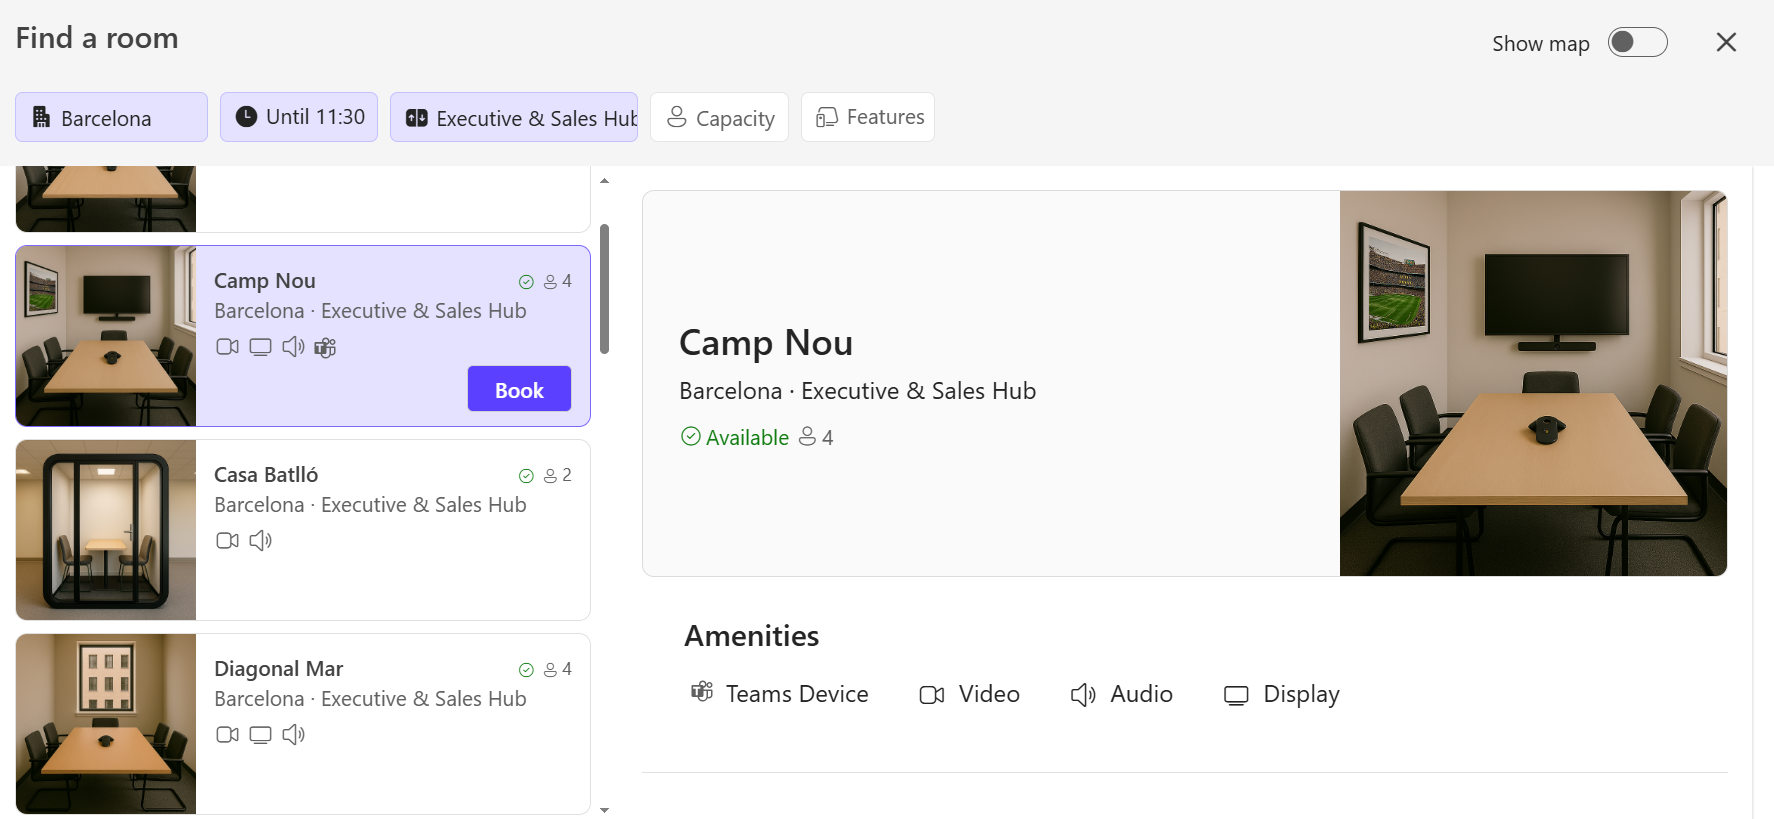
Once the profile picture is set, Microsoft Places automatically picks it up and displays it as the space image, this is great not only for the user experience in Microsoft Places but also for the integrations like the Appspace kiosk that can show exactly what the user is looking for.
So even without native UI support, the platform already has everything needed to show the picture, you just need to update it in the right place.


No comments yet