

 HANDS ON SharePoint
 HANDS ON Teams
 HANDS ON Lists
 HANDS ON tek
 M365 Admin
Share your internet access with Hyper-V virtual machines
Creating a Hyper-V virtual machine is a straightforward process and can be done in just a few steps, however once you get your new operating system installed and depending on your network configurations you may find your self without internet access from the guest operating system.
If you already have your Hyper-V virtual machine configured and are not able to share your wireless internet connection, this article will explain you how to do it in just a 6 simple steps.

How to share the wireless internet connection with Hyper-V
Once the virtual machine is installed and configured, from Hyper-V do the following:
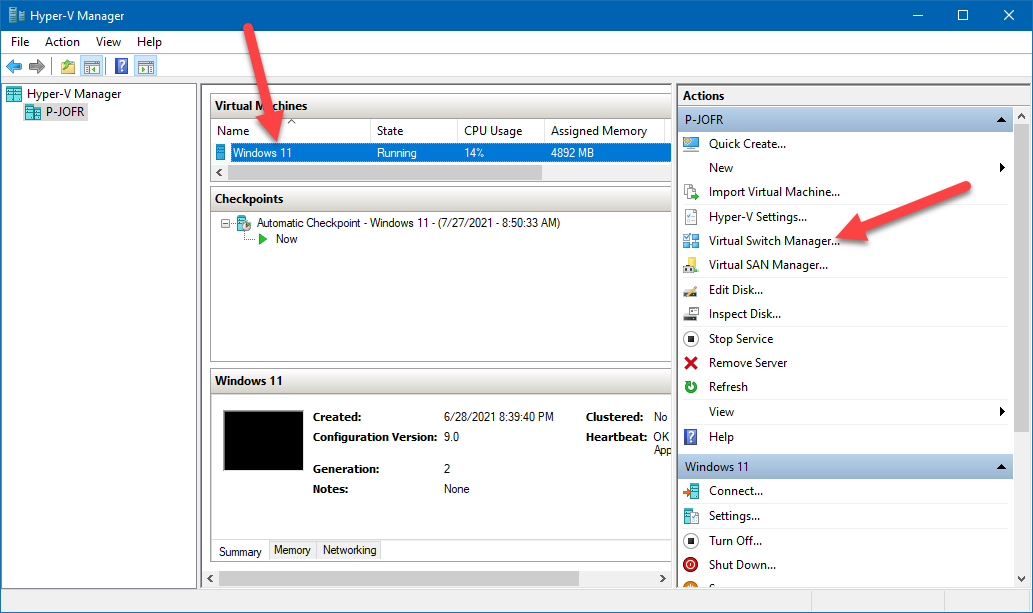
- Select the virtual machine and form the Actions pane click on Virtual Switch Manager
- On the Create Virtual Switch select Internal and then click Create Virtual Switch
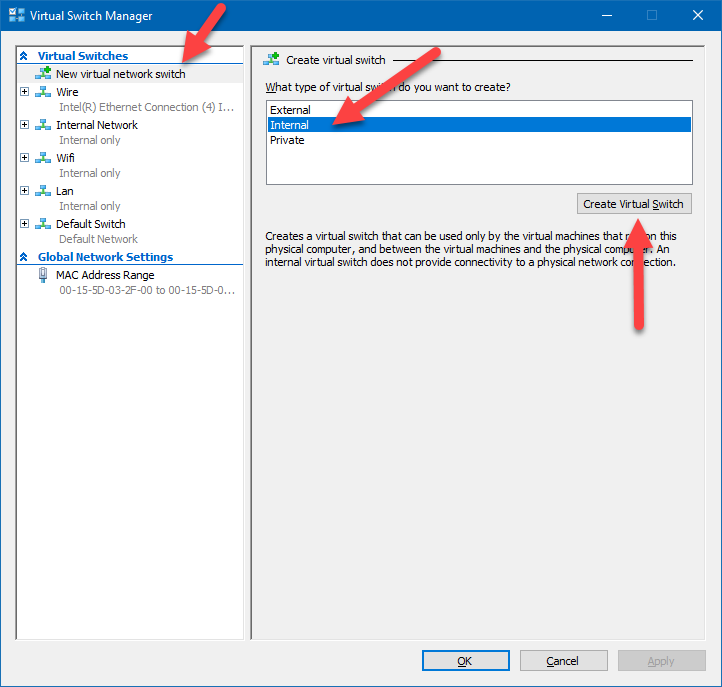
- Provide a name for your new Virtual Switch, select Internal network, and click OK
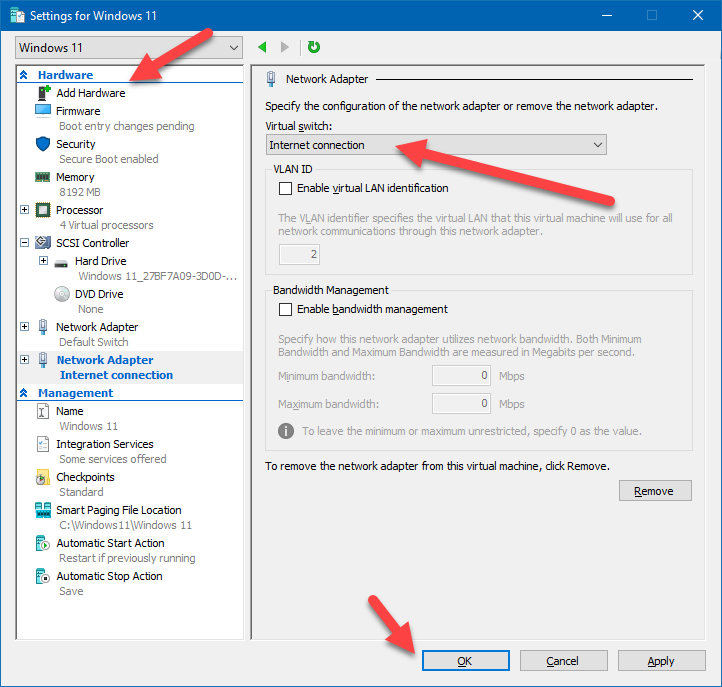
- Go back to your Virtual machine and open the Settings window
- Click on Add hardware, select Network Adapter and then click Add
- In the virtual switch select your newly created switch and click OK
Restart your virtual machine and you should get internet access form it.


No comments yet