

 HANDS ON SharePoint
 HANDS ON Teams
 HANDS ON Lists
 HANDS ON tek
 M365 Admin
How to screen record in Windows 11
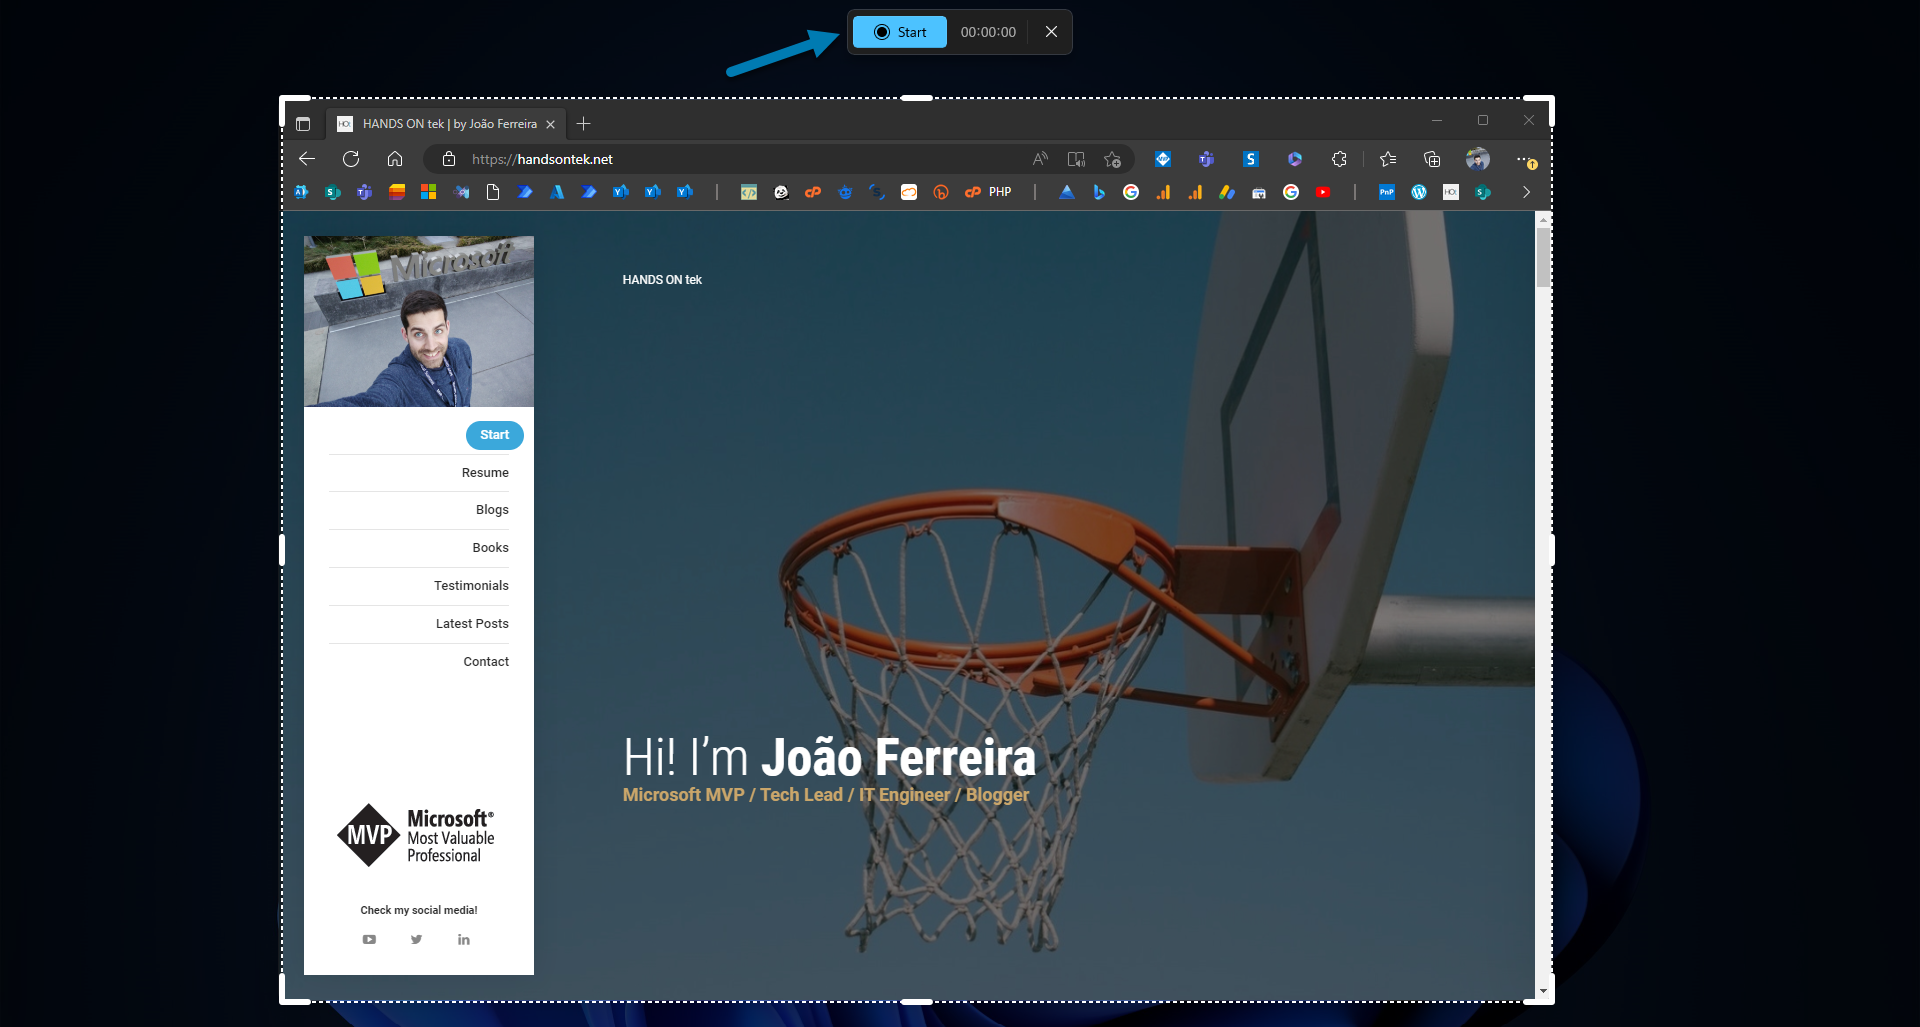
Screen record on Windows was one those features that always required the use of a third party solution, but now with a recent update on the built-in snipping tool you can easily record your screen and share it the way you want.
The snipping tool allows you to record full screen or a partial area or window on your computer but unfortunately it does capture the sound.

To record your screen using the snipping tool do the following:
- Start by opening the Snipping Tool on Windows
- In the tool bar click in the record button
- Click New

- Select the region you want to record
- Click Start, and wait for the count down
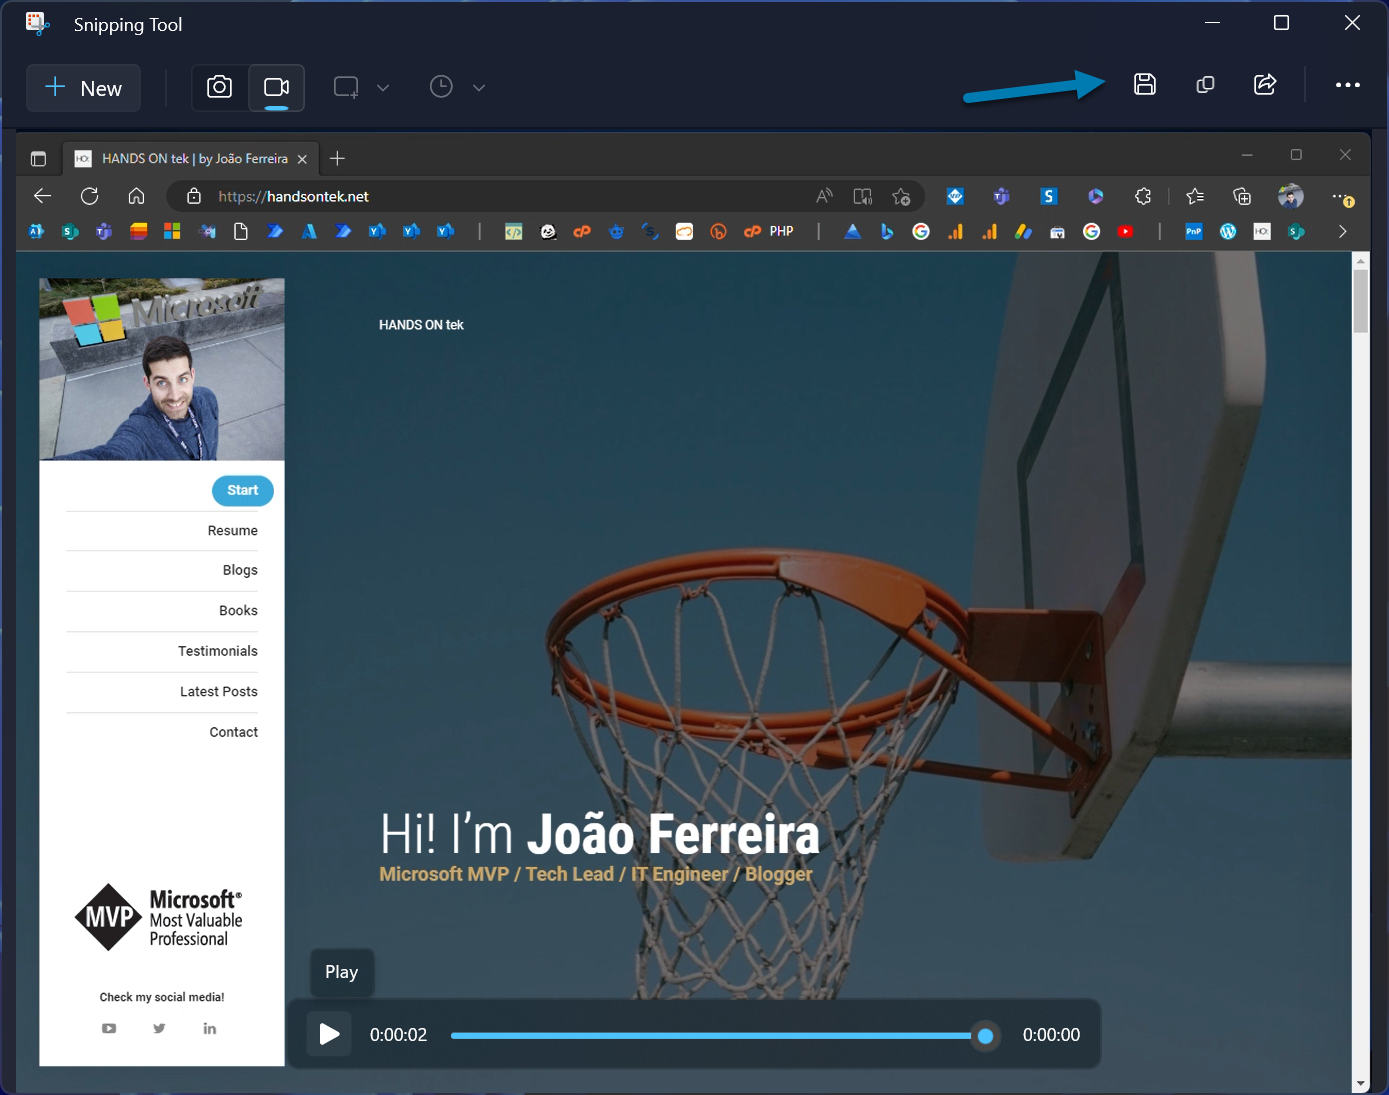
- Once you finish the video click the stop recording button located at the top of the screen
- Watch the recording in the Snipping Tool and if you are happy with the end result click the Save button, the video file will be stored in your computer in the MP4 format
If you don’t see this feature yet available on your Windows 11 make sure all the latest updated are installed in your computer, if you want to start receiving these type of features earlier join the Windows Insider Program.


No comments yet